Warmth.

IMG_4019

As I write this, it is 34 degrees F outside, with a wind chill of 24 degrees.  A far cry from yesterday and a sunny temp of 64.  It is the first time this year I honestly believe winter is just over the hill.

So I need warmth.  Comforting soup with real flavor and depth.  So I am making Roasted Butternut Squash soup.  Topped with sour cream, fried sage and bacon.   Just what the doctor ordered.  Or in my case, my stomach.

Roasted Butternut Squash Soup

Ingredients:

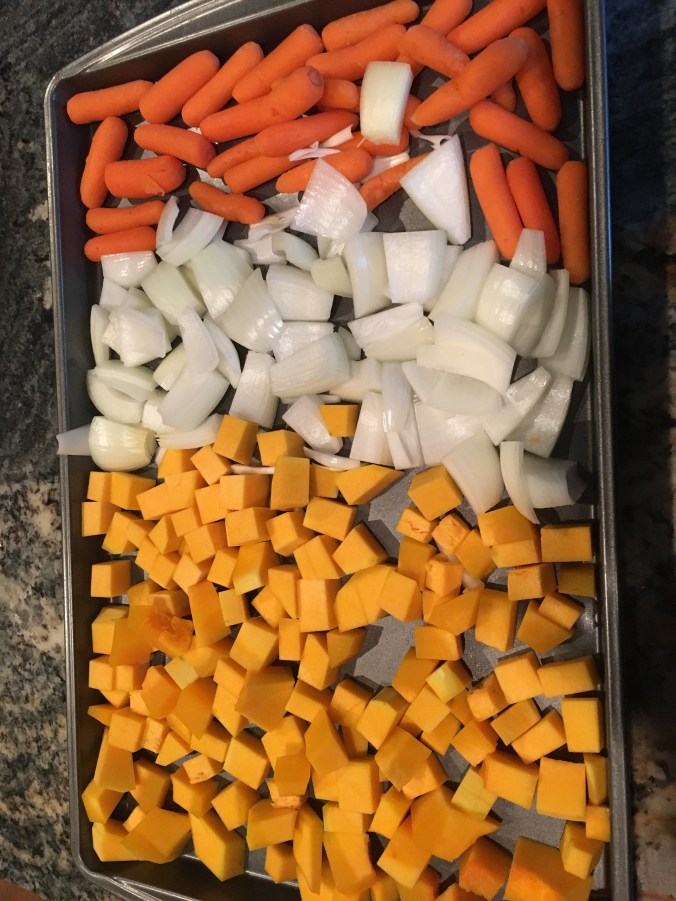
1 large Butternut Squash

1 medium sweet onion

1 cup small carrots.

2-3 Cups Chicken Broth

1 C coconut milk, full fat

1/8 tsp dried sage

1/8 tsp nutmeg

5-6 leaves fresh sage, or enough for 2-3 leaves per serving.

3-4 slices thick cut bacon

Olive Oil

Sea Salt and Pepper

Sour cream or coconut milk for topping

Optional: Roasted, salted Pumpkin Seeds for topping

Here We Go:

Preheat oven to 375 degrees F

Poke the Butternut Squash all over with a knife.  Put on microwave safe dish and nuke for 5 minutes.  Will speed the roasting time and make peeling and chopping the squash MUCH easier.

Peel, clean out the seeds, chop and add to rimmed cookie sheet.  Chop onion and add carrots to roasting pan.

IMG_4113

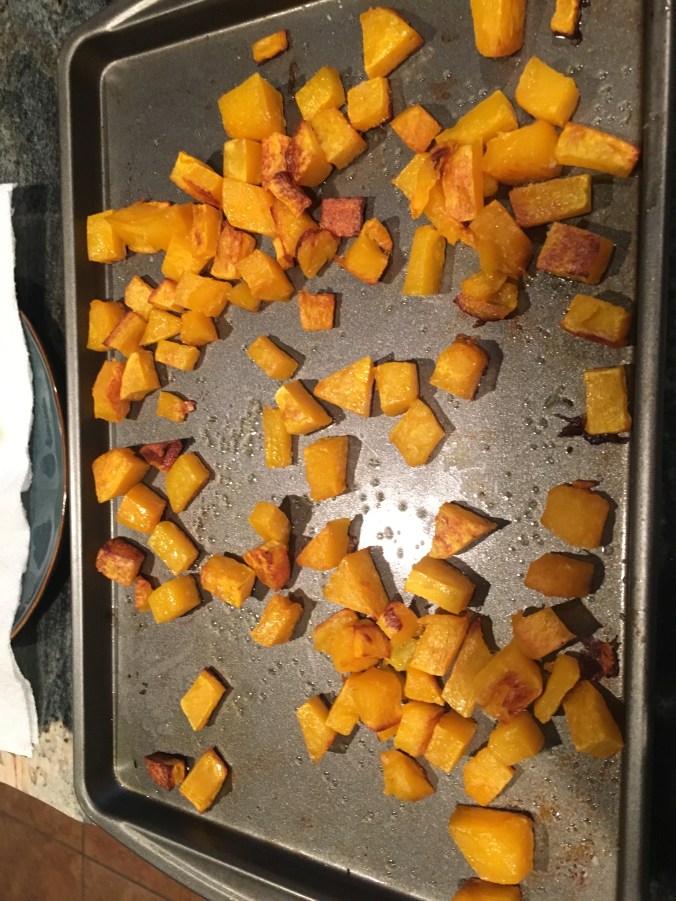
Drizzle with olive oil.  Place into oven.  HINT:  do not add sea salt yet- if you do, it causes vegetables to steam rather than roast.  Add near the end of roasting process.  Should take about 20-25 minutes to see some brown bits on the squash.  If the onions or carrots finish quicker, remove them to a bowl and let cool.

IMG_4114

While veggies are roasting, put the 3 cups of chicken broth in a pot to heat.  I like to use warm as it seems to blend better and keeps the soup hot.

Put the bacon on a plate lined with paper towels.  cover with another paper towel.  Microwave till the bacon is your desired level of crispness.  Blot off any excess grease with a clean paper towel.  Chop and set aside for serving.

Cover the bottom of fry pan with Olive oil.  Bring up to medium heat.  Gently add the Sage leaves to the hot oil.  NOTE: they will cook very quickly.  DO NOT leave the pan.  Cook on one side till crisping- about 30 seconds.  Flip for about 10 more seconds.  The leaves will be crispy.  Remove from oil and place on clean paper towel to drain any extra oil.

Once the squash, carrots and onions are tender,  place in  to the medium soup pot. Add the coconut milk and 2 cups of the warmed broth, and spices.  Using an immersion blender, puree till smooth.  Be careful to keep the blender under the surface as the mix will be hot.

Alternatively, you could add the veggies et al into a Vitamix and puree.  Use the reserved 1 cup broth to thin to the desired consistency.  Add Salt and Pepper to taste.

Spoon into bowls. Swirl with a bit of sour cream, or coconut milk.  Top with crumbled bacon and 2-3 fried sage leaves.

Some dense crusty seed-laden bread, a nice salad with arugula, cranberries, walnuts and mustard vinaigrette and you are done!

IMG_4116

Feeling warmer already!

Enjoy!

Terri


Delish.

IMG_4014

Everyone talks about comfort food when the weather gets cold.  And typically, it is heavy calorie dense food.  Not that there is anything wrong with that.  However, I like to eat food that feels and tastes good, but is dense in goodness.

To that end, I made a Cauliflower Crust Pizza.  And instead of typical red sauce and pepperoni, I made it with pesto, prosciutto, sautéed mushrooms  and fresh mozzarella.  Full of flavor and vegetables, it satisfies without weighing you down.

If you are looking for the identical crust as regular pizza- almost, but not quite.  I am working with modifying the recipe to deliver that same bite.  I can tell you that this is delicious.  And no bloated tummy.

Cauliflower Pizza Crust: 

Ingredients:

4 C riced Cauliflower  (Hack: you can buy this frozen at the grocery store)

1 tsp dried basil OR 1 tsp Tuscan style Italian Seasoning.  find it in the spice aisle.

1 tsp dried oregano

2 tsp garlic powder

pinch of salt

2/3 C shredded parmesan cheese

2/3 cup shredded mozzarella  NOT fresh!

1 egg

+ whatever you want for toppings; pizza sauce, pesto, sausage, olives, etc

 Here We Go:

Preheat oven to 450 degrees F

Chop up medium head of cauliflower; throw away the stems and rice the cauliflower in your food processor.  Hint: should look like grains of rice.

Microwave the cauliflower for 8-9 minutes.  You want it to soften.  Place the cooked cauliflower on a clean white towel and wring out the water.  And wring again.  And again.  The more water you get out, the crisper the crust.  When done, will look like a dough ball.  (observant people: you can see that I added the oregano to the cauliflower prior to microwaving)

IMG_3980

Place the cooked cauliflower, spices, cheeses, eggs and salt into a bowl and mix together.

Put a piece of parchment paper on a cookie sheet. Spray with non-stick butter spray. Place cauliflower (Note: I like to break this into 3 personal pizzas- can vary the toppings to offer different flavors)

Put in the oven and bake for 15 minutes.  Edges should start to brown and the center set.  Then flip over and bake for 4-5 minutes more.  Remove from oven and let cool.

IMG_3983

Turn the oven down to 350 degrees F.

Add toppings to your crust and then bake in 350 degree oven for 3-5 minutes.  I then turn on the broiler to get the cheese to get those golden brown crunchy pretty bits.

IMG_3982


Note: I am playing with the recipe to see if I can make it a bit more “crusty”.  Playing with almond flour and egg whites for more lift.

IMG_3985

This is delish.  And yummy.  And. SO. GOOD!

Enjoy!


Terri


Crisp.


IMG_6170As fall comes stealing into the mountains, I relish the change of seasons.  Cool mornings, warm sunny days, crisp starlit nights sitting by the fire.

My good friend, Lois Presley, talented host, interior design maven, and all around beautiful woman, gave me this recipe for Turmeric Zucchini Pickles.   Ok, I did add sliced radishes to the mix, but the inspiration came from her.  And everyone knows the benefits of Turmeric in your diet.  So they are good for you, (fit the Keto lifestyle too with a minor adjustment), taste amazing.  Enjoy the crisp tangy delish treat!  Thank you Lois!

Turmeric Zucchini Quick Pickles

Ingredients:

1 lb. zucchini sliced crosswise thin slice.  (I used smaller zucchini to make sure they were very firm)

1/2 C onion sliced thin.  (I went a bit up from here- just shy of 1 C.  But I like onions a lot)

2 bunches radishes, sliced thin crosswise.  (they turn a lovely yellow and the skin turns pink!)

3 T kosher salt

1/3 C sugar  ( try stevia to make this sugar free.  And make it KETO friendly  Make sure not to use too much.  Don’t want these sweet)

1 1/2 cups unfiltered apple cider vinegar

1 1/2 tsp dry mustard powder

1 tsp ground turmeric

2 tsp yellow mustard seeds, crushed  (use a good mortar and pestle for this)

Ice water

Putting It Together:

In a large bowl, toss zucchini, onion & radishes with 2 T of kosher salt.  cover with ice water and let stand about 30-45 minutes.  They should slightly soften.  Drain and pat dry.  This will take a lot of paper towels or clean white towels.  This is essential- you want them to absorb the brine.

While the zucchini mix is soaking, make the brine.  In a medium saucepan, add 1 T kosher salt, the vinegar, sugar, mustard seeds, turmeric, mustard powder, and 1/2 cup of water.  Brine to boil- need to make sure the sugar is dissolved.   Let it cool to room temperature.

Transfer the zucchini, radish and onion mix to a large jar.  I used a large sealable jar or may need a couple of quart jars.   I used this one: pretty and functional.   https://www.walmart.com/ip/Mainstays-38-oz-Clear-Glass-Jar-with-Clamp-Lid/21994250

IMG_2862

Seal the jar tightly.  Place in the refrigerator overnight before serving.

These are tasty!

Enjoy!

Terri