Abundant.

IMG_2558

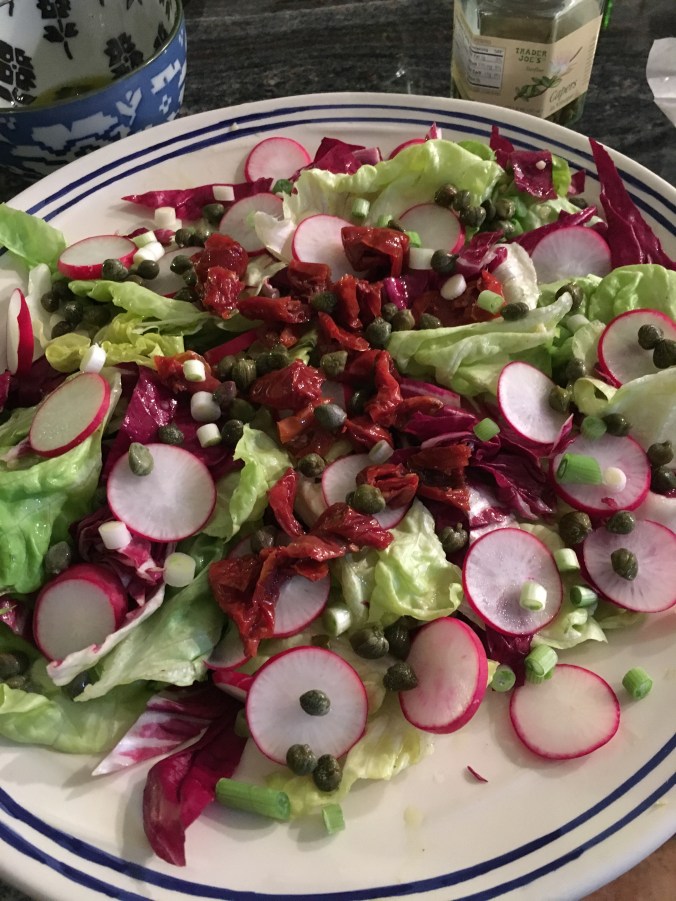
We are lucky to have so many food options available to us in the United States.  We can shop globally for that unique ingredient at our local grocery store.  We have abundance-we don’t need to trek for miles to find bread. And ten more miles to get butter.  Or milk.  To that end, I ask you to contribute to a local food effort to feed those in need.  My personal favorite is Backpacks for Hungry Kids.  Pick one that speaks to your heart and make a difference.  For me, no child should be hungry.  That is a travesty.  And tragic.

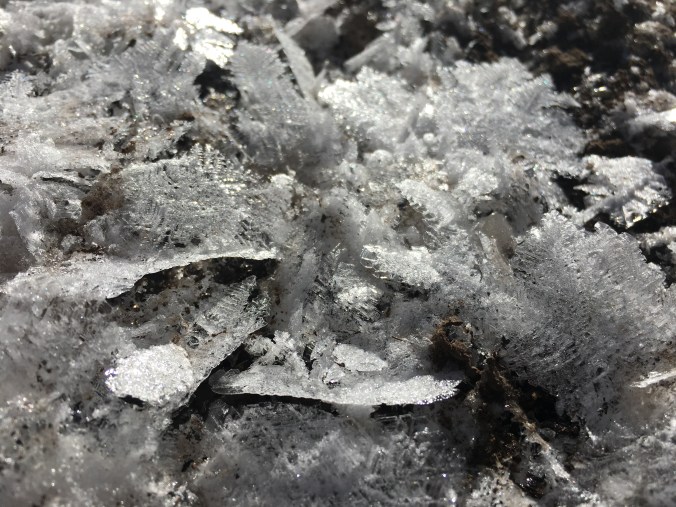
This recipe is about abundance-plenty of veggies, luxuriant cream cheese, artichokes, rich flavors.  And as I write this, we just received 2″ of snow!  And it’s April 17th!  I think alot of the frustration is that we were in the southwest last week- and I am so ready for spring!

Let’s do this!

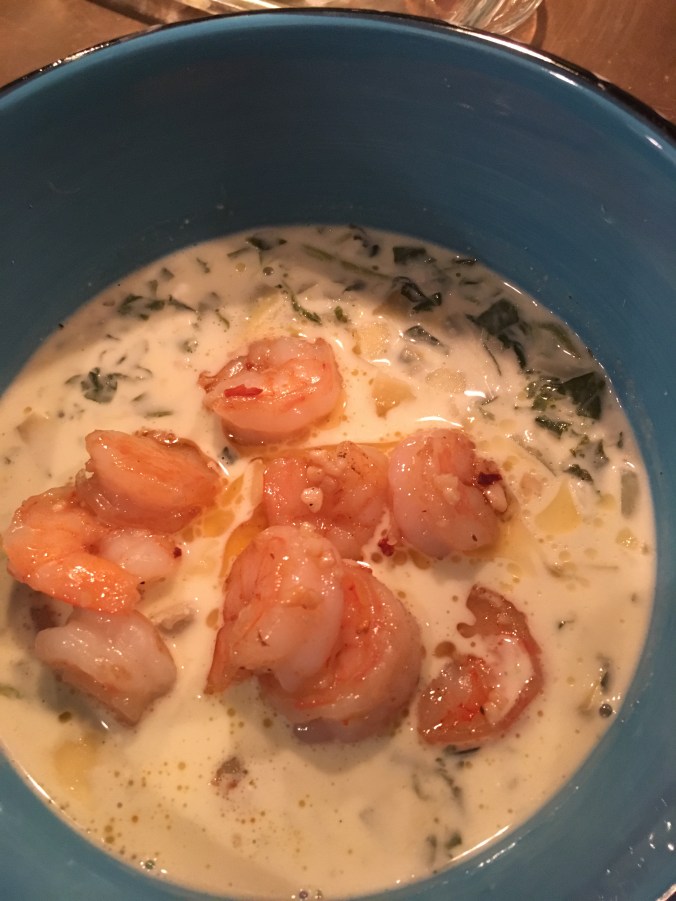
Spinach and Artichoke Soup

Ingredients:

  • 2 Tablespoons Butter
  • 1 Onion, chopped
  • 4 Garlic Cloves, minced (Hack: use the jarred minced garlic in Olive oil)
  • 1 – 9-ounce pkg. Frozen Chopped Spinach, drained and squeezed dry
  • 1 teaspoon Salt
  • 1 teaspoon Pepper
  • 1/2 tsp onion powder
  • 1/2 tsp garlic powder
  • 4 cups Chicken Broth
  • 1 – 14 ounce can Artichoke Hearts, drained and roughly chopped OR use a thawed package of Trader Joe’s Frozen Artichoke Hearts.  Will need to rough chop for soup
  • 1- 1½ cups Heavy Cream  (may want to adjust to personal taste)
  • 1 – 8-ounce pkg. Cream Cheese, room temp and chopped into 6 pieces.
  • 1 cup Parmesan Cheese
  • 1 lb. shrimp
  • 1 tsp crushed red pepper
  • 1/2 tsp Hungarian Paprika (optional)
  • 2 T minced garlic
  • 2 T Olive oil
  • 1 T Butter
  • Additional Shaved Parm for garnish

IMG_5612

Putting it Together:

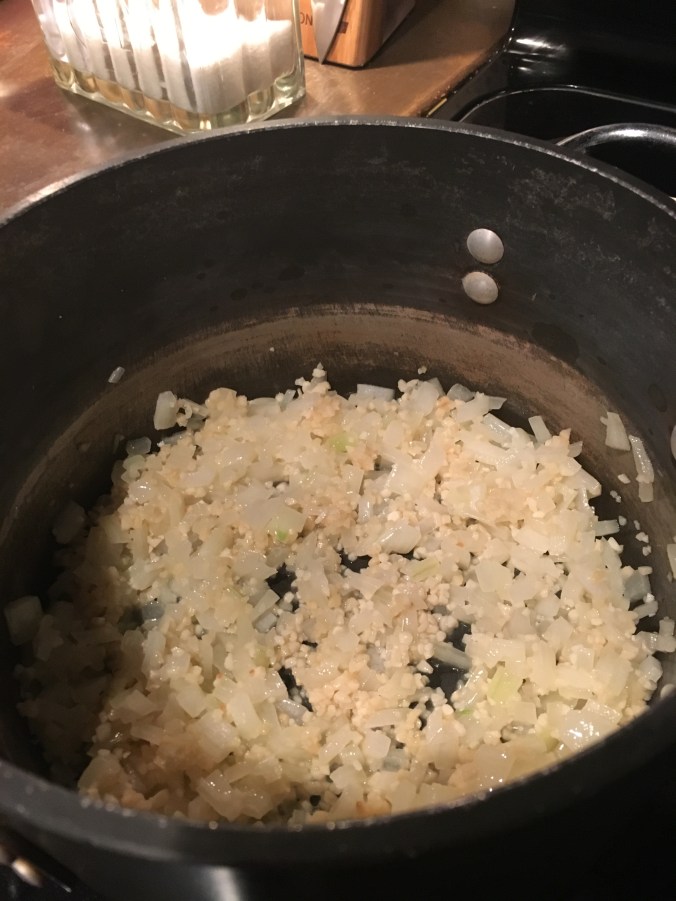
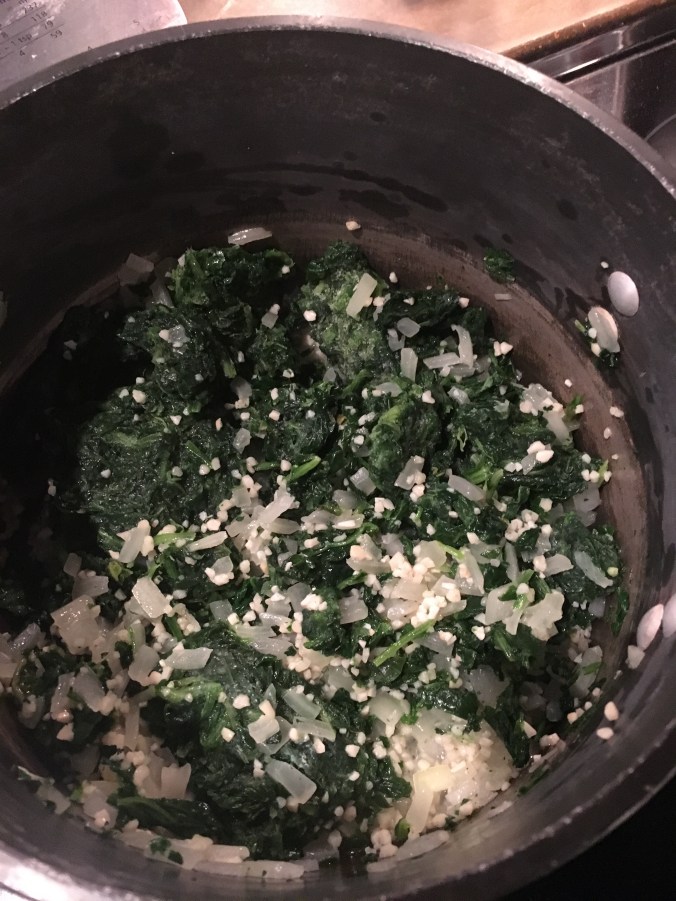
Add the 2 T butter to soup pot and melt.  Add the onion and cook till translucent.  Should take about 7-10 minutes on medium heat.  Add the garlic to onion and watch closely.  Don’t want garlic to burn.  Add spinach to pot; break up any chunks with spoon.

IMG_5613

Add chopped drained artichokes to soup pot.  Add in broth.  Add in salt and pepper.  Add in garlic and onion powder. Mix in the cream cheese bit by bit- actively stirring each hunk until melted in.  Slowly stir in the heavy cream till thoroughly blended.  Reduce heat to simmer, do not allow to boil.

IMG_5615

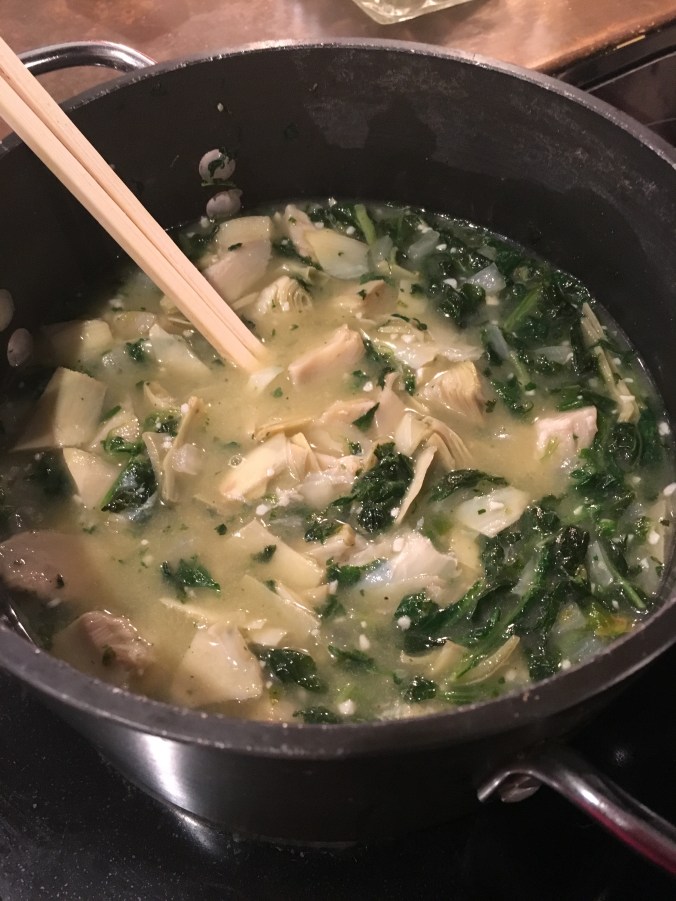
Note: I like to use chop sticks to break up stuff- like spinach or stirring scrambled eggs into pretty little curds.

While the soup is simmering, heat deep saute pan to medium. Add in the 2 T olive oil and 1 T butter to the pan.  Sprinkle in the crushed red pepper, garlic and paprika.  Heat till fragrant (only about 1 minute).  Add in the cleaned and detailed shrimp.  Cook till pink and cooked through. Reduce heat.


Back to the soup- mix in the cup of Parmesan cheese.  I would mix in in 1/4 cup increments. May want to adjust salt and pepper at this point to taste.

Let simmer about 5 more minutes.   Ladle into shallow bowl.  Place a few or more shrimp in each bowl.  Drizzle with a bit of the oil/butter mix from shrimp over top.  Sprinkle with additional shaved parm.  I also like a bit of fresh crushed pepper and some chopped cilantro, but that is optional.

IMG_5619

Let me know what you think,

Enjoy!

Terri


Away.

IMG_4280

Sometimes being away from home is a blessing.  And sometimes it’s for unpleasant things as well.  Even when you are far away from home, it gives us the time to reflect, take in new beauty, breathe deep and appreciate the blessings we do have in our lives.

The last time I was away from home, I had the opportunity to eat at a wonderful discovery- Golden Harvest in downtown Lansing.  My sons had been telling me about it so we needed to make the run.  What a find! THIS IS GOOD FOOD! https://www.facebook.com/goldenharvestrestaurant/

IMG_5697

The food was wonderful, the vibe and staff fun and friendly.  We sat at the bar and laughed with the cooks.  If you are someone who is uptight, driving for a hard deadline for eating lunch/brunch or have zero personality and are demanding- this is not the place for you.  Stay away.  I don’t want someone messing with my zen thank you.

IMG_5692

My son had waffles with strawberries and cream.  With a side of bacon and their spicy home fries.   I had the Garden Omelet with avocado and sausage added.  It was served with homemade white bread, ( i did not specify what toast I wanted), and those delicious home fries.  Sorry you didn’t see the whole omelet, but I lost my mind for a moment and dove in.

IMG_5691 (1)

We watched the team make a peanut butter chocolate waffle-if decadence has a name, that is it.  Warm waffle, with chocolate chips. And did I mention the caramelized bananas added? Drizzle of hot peanut butter sauce, plenty of whipped cream and hot chocolate drizzle.  I think Elvis would eat two.  Maybe three.

You have to respect anyone that uses a skull and fork & knife for their logo.  Death by fantastic eating?  Perhaps.  But bring cash.  No CC’s here.  And remember to tip your cooks- the ones that will bring you back again and again.

Enjoy!

Terri


Crux.

This has been a strange winter here in the mountains. Not much snow. Lots of sun. And when the clouds look like they are about to unleash snow or rain, nothing happens. And not that I am complaining. I love the sun and the mild temps. As long as I have groomers to ride at Park City, I am happy.

But the issue is, we need the snow. We need the snow to fill our reservoirs, provide moisture to the forests and fields, make sure that summer is not too hard on the wild life. Not to mention makes me think that March and April may bring loads of inches of precipitation and the mud will be incredible.

With this recipe, the crux is the balance between healthfulness and taste. I am currently exploring the Ketogenic diet. Or as I prefer, Keto lifestyle. It’s hard to get the nutritional pyramid out of your head, or my mother’s voice telling me to eat more fruit. The veggie part, no problem for me. Bring on the veggies!

This recipe is delish. Sexy, silky and virtually hard to stop eating. And if you have any leftovers, cut in thin slices and put on a romaine lettuce salad with parmesan cheese and avocado. Or, if you are not keto, put it warm from the oven with the sauce on top of a parmesan-laden polenta. Nirvana!

CRISPY PORK BELLY WITH ASIAN SAUCE
Note: this recipe requires marinating the meat for 4-24 hours

INGREDIENTS:
2 lb. skinless pork belly
1/4 cup soy sauce
1/4 cup rice wine vinegar
5 scallions, sliced diagonally. Use the white and bright green parts
2 T minced garlic
1 T Hoisin sauce
1 T sesame oil

Here We Go:
Marinade:
Combine the soy sauce, scallions, rice wine vinegar, garlic, Hoisin sauce and sesame oil in a gallon zip lock bag. Zip shut and squish around till combined. Add the pork belly to the bag. Close, and put the kit and caboodle in the refrigerator for a minimum of 4 hours. Max I would recommend is 24 hours.

IMG_4966

Preheat the oven to 450 degrees F.

Put the Pork Belly, fatty side up in a cast iron pan. Reserve the marinade. Set your kitchen timer for 30 minutes and put the pork belly in the oven. Alternatively, you could line a baking dish with tin foil.

When the kitchen timer goes off, adjust the temperature to 275 degrees F. Reset your timer to 1 hour. Remember pork is done when it reaches 145F internally. You may want to check the meat at 45 minutes. Just make sure the top is crispy and smells heavenly.

Remove the meat to a plate and lightly cover with tin foil-it should rest for 15 minutes. Take the reserved marinade, and add into cast iron pan. Scrape the tasty bits into the marinade. Set the stove to medium-enough to bring the sauce to a simmer, and reduce to consistency where it coats a spoon.

IMG_4968

Slice the pork belly across the grain. Spoon the sauce over the top. As you can see, I served it with a simple salad of sliced cucumbers, thinly sliced onion and halved grape tomatoes tossed with a little bit of salt and a good dose of rice wine vinegar.

IMG_4969

Enjoy!
Terri


Gift.

IMG_4509

A gift can be many things.  It can be a hug, a kind word, an actual present, an unexpected surprise, a vision from nature, another day with a loved one.  Each and every one of these should cause us to take a moment and be thankful for all that we have.

I have the good fortune to be gifted with a full filet of smoked salmon.  And there is only so much salmon you can eat on a croute with diced hard boiled eggs, capers and lemon.  So I put some in the freezer, and decided to make salmon burgers with smoked red peppers with the rest.  Serve with a green salad with mustard vinaigrette.  Dinner is served.

Smoked Salmon Burgers with Roasted Red Peppers

Ingredients:

1 3/4 cup flaked salmon

2 eggs

1/2 a medium sweet onion, chopped fine

1/4 cup chopped roasted red pepper.  (use Mt Olive in water.  will need to pat dry before chopping)

3 T mayonnaise  ( I like the avocado mayo by Best Foods or Vegannaise)

3 T almond flour  ( Can use panko bread crumbs if you are not doing Keto.  May want to add a touch more-need the patties to stay together.)

1/2 a lemon juiced

2 tsp Dijon mustard

Pepper and Salt to season

Olive oil to fry

Here We Go: 

Preheat heavy skillet to medium heat.  Whisk the egg, mustard, mayo, lemon juice together.  Add in salmon, red pepper, onion, and almond flour.  Lightly mix.  Add Olive oil to pan.  Form 6-8 patties with your hands and individually add them to the pan.  Let them brown on bottom side, about 3-5 minutes, then flip.  Cook another 3-5 till desired level.  I like a bit of crispness to my salmon burgers.

I make a tartar sauce by mixing about a 1/2 cup of mayo, 1 T dill pickle juice and a minced dill pickle.

IMG_4952

Enjoy!

Terri


Plenty.

IMG_3843

So, OK.  it is a not just a blessing, it is a nod to Yottam Ottolenghi.  I love his fresh take on cooking. And while he is not a vegetarian, his focus on vegetables is amazing-fresh, unique, flavorful, layered.

After a season  of plenty, its time to focus on a different plenty- one of plenty of satisfaction, flavor and taste without plenty of calories.  And the right kind of calories.  I did tweak the original recipe; so here is my version.  I also recommend doubling the dressing, which i have done in this recipe.

Lettuce Salad with Oil-packed Tomatoes and Capers

Ingredients:

1 small head radicchio, cleaned dried and leaves separated

1 head butter lettuce, cleaned dried and leaves separated

1 head curly lettuce, cleaned dried and leaves separated

5 green onions, white and green parts cut on an angle

10 radishes, cleaned and dried, sliced thin

1/2 a 6.7 jar of oil-packed sun dried tomatoes, sliced thinly across the tomatoe

2-3 tsp small capers

Dressing:

2 garlic cloves crushed, then minced

3 T fresh lemon juice

3 T olive oil

2 T avocado oil

Generous salt and pepper

Here We Go:

In a large clean bowl, put in lettuces.  Add in radicchio, onions, sliced radishes and sliced tomatoes.

Whisk dressing ingredients together.  Pour over lettuce mix and lightly toss.  Move lettuce mix to a clean dry serving platter and sprinkle the capers on top.

IMG_4780

Yummy!

I served this with seared scallops in sage oil with fried sage leaves.  Delish!

IMG_4781

Enjoy!

Terri


Delish.

IMG_6464.jpg

I know, I know.  Everyone wants to push pumpkin on you.  It’s fall.  I get that.  But who wants to eat pumpkin sushi?  Seriously, anyone on the planet?  Pumpkin latte?  Done.  Pumpkin bread? Yep.  Though must admit, completely over the bread with chocolate chips.

So here I am, giving you yet another option for Pumpkin.  A DELISH muffin, with crunchy topping that has walnuts, coconut sugar, and rich in taste and actually, good for you.  Great for breakfast or as a snack.  And they are actually Paleo.  However, if no one told you, you would never know.  Eat them warm out of the oven with a pat of butter.  Or nuke in the microwave for 20 seconds.

Paleo Schmaleo Pumpkin Muffins  (Yes, they are that good!)

Ingredients:

Muffin mix:

    • 1/4 cup melted coconut oil
    • 1/4 cup maple syrup
    • 1/4 cup coconut sugar
    • 1 cup canned pumpkin
    • 4 eggs
    • 1 cup almond flour
    • 1/4 cup coconut flour
    • 1/2 teaspoon baking soda
    • 1 1/2 teaspoons pumpkin pie spice
    • 1/2 teaspoon cinnamon
    • 1/4 teaspoon nutmeg
    • 1/2 teaspoon salt
    • 1/2 C Chopped Walnuts
Crumb Topping:
  • 1/4 cup coconut flour
  • 1/2 cup almond flour
  • 2 tablespoons coconut sugar
  • 1/2 teaspoon cinnamon
  • 2 tablespoons maple syrup  (or use sugar-free for Keto)
  • 2 tablespoons coconut oil
  • 1/4 C chopped walnuts
  • 2 T butter

Let’s Go:

Preheat oven to 350 degrees F.  Grease a muffin tin with butter- this will make 12 standard size muffins.

You can make either part first; honestly, I don’t think it matters.  So let’s start with the batter for the muffins.  Mix the wet ingredients, and stirring well to combine.  Then add the dry ingredients. Add the chopped walnuts last, stirring gently to mix in.   Let stand while you mix the crumb topping.

IMG_4120

For the crumb topping, put all ingredients, except walnuts into a medium bowl and combine.  Should resemble crumbles.  Add in walnuts.  Stir to incorporate.

IMG_4119

Begin spooning batter into the muffin tins.  Fill about 3/4 way full.  Then top with crumb mixture.   Use it all up!

IMG_4123

Put into oven and cook for 30 minutes.  Check with toothpick- should come out clean.  If it doesn’t, put it back in for a few more minutes but watch closely.  You don’t want the crumb mixture to burn.

When done, remove from oven and run a knife around the outside of each muffin.  Should come out easily from the muffin tin.  Place on cooling rack.

Personally, I need to have one right out of the oven with a pat of butter.  SO GOOD!  Even my husband calls these the best muffins ever!

IMG_4124

PS. Keep them in the refrigerator.  Then pull one out and micro for 20 seconds.  If they last that long!

Enjoy!

Terri


Warmth.

IMG_4019

As I write this, it is 34 degrees F outside, with a wind chill of 24 degrees.  A far cry from yesterday and a sunny temp of 64.  It is the first time this year I honestly believe winter is just over the hill.

So I need warmth.  Comforting soup with real flavor and depth.  So I am making Roasted Butternut Squash soup.  Topped with sour cream, fried sage and bacon.   Just what the doctor ordered.  Or in my case, my stomach.

Roasted Butternut Squash Soup

Ingredients:

1 large Butternut Squash

1 medium sweet onion

1 cup small carrots.

2-3 Cups Chicken Broth

1 C coconut milk, full fat

1/8 tsp dried sage

1/8 tsp nutmeg

5-6 leaves fresh sage, or enough for 2-3 leaves per serving.

3-4 slices thick cut bacon

Olive Oil

Sea Salt and Pepper

Sour cream or coconut milk for topping

Optional: Roasted, salted Pumpkin Seeds for topping

Here We Go:

Preheat oven to 375 degrees F

Poke the Butternut Squash all over with a knife.  Put on microwave safe dish and nuke for 5 minutes.  Will speed the roasting time and make peeling and chopping the squash MUCH easier.

Peel, clean out the seeds, chop and add to rimmed cookie sheet.  Chop onion and add carrots to roasting pan.

IMG_4113

Drizzle with olive oil.  Place into oven.  HINT:  do not add sea salt yet- if you do, it causes vegetables to steam rather than roast.  Add near the end of roasting process.  Should take about 20-25 minutes to see some brown bits on the squash.  If the onions or carrots finish quicker, remove them to a bowl and let cool.

IMG_4114

While veggies are roasting, put the 3 cups of chicken broth in a pot to heat.  I like to use warm as it seems to blend better and keeps the soup hot.

Put the bacon on a plate lined with paper towels.  cover with another paper towel.  Microwave till the bacon is your desired level of crispness.  Blot off any excess grease with a clean paper towel.  Chop and set aside for serving.

Cover the bottom of fry pan with Olive oil.  Bring up to medium heat.  Gently add the Sage leaves to the hot oil.  NOTE: they will cook very quickly.  DO NOT leave the pan.  Cook on one side till crisping- about 30 seconds.  Flip for about 10 more seconds.  The leaves will be crispy.  Remove from oil and place on clean paper towel to drain any extra oil.

Once the squash, carrots and onions are tender,  place in  to the medium soup pot. Add the coconut milk and 2 cups of the warmed broth, and spices.  Using an immersion blender, puree till smooth.  Be careful to keep the blender under the surface as the mix will be hot.

Alternatively, you could add the veggies et al into a Vitamix and puree.  Use the reserved 1 cup broth to thin to the desired consistency.  Add Salt and Pepper to taste.

Spoon into bowls. Swirl with a bit of sour cream, or coconut milk.  Top with crumbled bacon and 2-3 fried sage leaves.

Some dense crusty seed-laden bread, a nice salad with arugula, cranberries, walnuts and mustard vinaigrette and you are done!

IMG_4116

Feeling warmer already!

Enjoy!

Terri


Delish.

IMG_4014

Everyone talks about comfort food when the weather gets cold.  And typically, it is heavy calorie dense food.  Not that there is anything wrong with that.  However, I like to eat food that feels and tastes good, but is dense in goodness.

To that end, I made a Cauliflower Crust Pizza.  And instead of typical red sauce and pepperoni, I made it with pesto, prosciutto, sautéed mushrooms  and fresh mozzarella.  Full of flavor and vegetables, it satisfies without weighing you down.

If you are looking for the identical crust as regular pizza- almost, but not quite.  I am working with modifying the recipe to deliver that same bite.  I can tell you that this is delicious.  And no bloated tummy.

Cauliflower Pizza Crust: 

Ingredients:

4 C riced Cauliflower  (Hack: you can buy this frozen at the grocery store)

1 tsp dried basil OR 1 tsp Tuscan style Italian Seasoning.  find it in the spice aisle.

1 tsp dried oregano

2 tsp garlic powder

pinch of salt

2/3 C shredded parmesan cheese

2/3 cup shredded mozzarella  NOT fresh!

1 egg

+ whatever you want for toppings; pizza sauce, pesto, sausage, olives, etc

 Here We Go:

Preheat oven to 450 degrees F

Chop up medium head of cauliflower; throw away the stems and rice the cauliflower in your food processor.  Hint: should look like grains of rice.

Microwave the cauliflower for 8-9 minutes.  You want it to soften.  Place the cooked cauliflower on a clean white towel and wring out the water.  And wring again.  And again.  The more water you get out, the crisper the crust.  When done, will look like a dough ball.  (observant people: you can see that I added the oregano to the cauliflower prior to microwaving)

IMG_3980

Place the cooked cauliflower, spices, cheeses, eggs and salt into a bowl and mix together.

Put a piece of parchment paper on a cookie sheet. Spray with non-stick butter spray. Place cauliflower (Note: I like to break this into 3 personal pizzas- can vary the toppings to offer different flavors)

Put in the oven and bake for 15 minutes.  Edges should start to brown and the center set.  Then flip over and bake for 4-5 minutes more.  Remove from oven and let cool.

IMG_3983

Turn the oven down to 350 degrees F.

Add toppings to your crust and then bake in 350 degree oven for 3-5 minutes.  I then turn on the broiler to get the cheese to get those golden brown crunchy pretty bits.

IMG_3982


Note: I am playing with the recipe to see if I can make it a bit more “crusty”.  Playing with almond flour and egg whites for more lift.

IMG_3985

This is delish.  And yummy.  And. SO. GOOD!

Enjoy!


Terri


Crisp.


IMG_6170
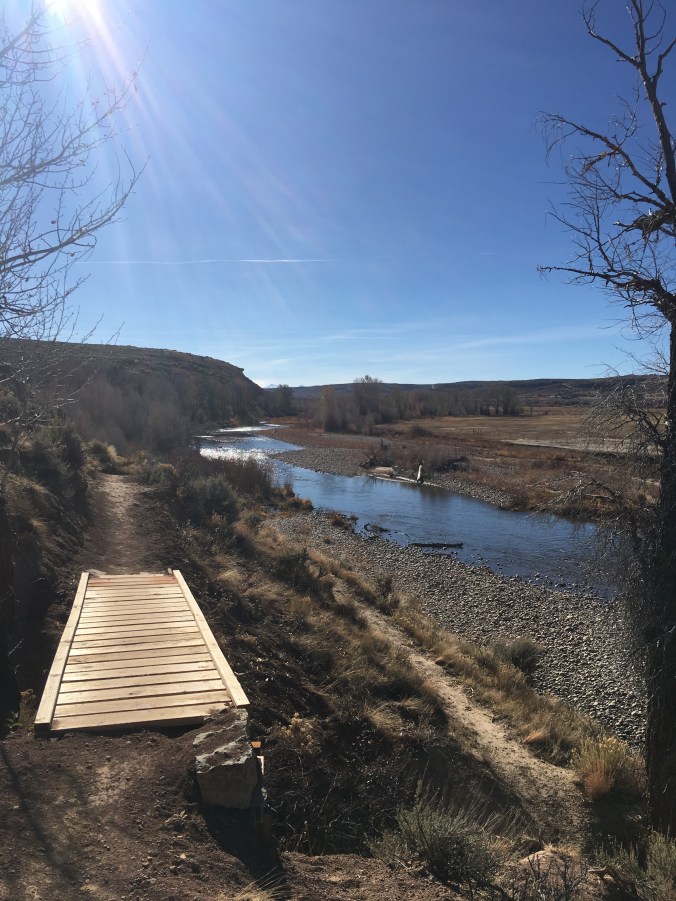
As fall comes stealing into the mountains, I relish the change of seasons.  Cool mornings, warm sunny days, crisp starlit nights sitting by the fire.

My good friend, Lois Presley, talented host, interior design maven, and all around beautiful woman, gave me this recipe for Turmeric Zucchini Pickles.   Ok, I did add sliced radishes to the mix, but the inspiration came from her.  And everyone knows the benefits of Turmeric in your diet.  So they are good for you, (fit the Keto lifestyle too with a minor adjustment), taste amazing.  Enjoy the crisp tangy delish treat!  Thank you Lois!

Turmeric Zucchini Quick Pickles

Ingredients:

1 lb. zucchini sliced crosswise thin slice.  (I used smaller zucchini to make sure they were very firm)

1/2 C onion sliced thin.  (I went a bit up from here- just shy of 1 C.  But I like onions a lot)

2 bunches radishes, sliced thin crosswise.  (they turn a lovely yellow and the skin turns pink!)

3 T kosher salt

1/3 C sugar  ( try stevia to make this sugar free.  And make it KETO friendly  Make sure not to use too much.  Don’t want these sweet)

1 1/2 cups unfiltered apple cider vinegar

1 1/2 tsp dry mustard powder

1 tsp ground turmeric

2 tsp yellow mustard seeds, crushed  (use a good mortar and pestle for this)

Ice water

Putting It Together:

In a large bowl, toss zucchini, onion & radishes with 2 T of kosher salt.  cover with ice water and let stand about 30-45 minutes.  They should slightly soften.  Drain and pat dry.  This will take a lot of paper towels or clean white towels.  This is essential- you want them to absorb the brine.

While the zucchini mix is soaking, make the brine.  In a medium saucepan, add 1 T kosher salt, the vinegar, sugar, mustard seeds, turmeric, mustard powder, and 1/2 cup of water.  Brine to boil- need to make sure the sugar is dissolved.   Let it cool to room temperature.

Transfer the zucchini, radish and onion mix to a large jar.  I used a large sealable jar or may need a couple of quart jars.   I used this one: pretty and functional.   https://www.walmart.com/ip/Mainstays-38-oz-Clear-Glass-Jar-with-Clamp-Lid/21994250

IMG_2862

Seal the jar tightly.  Place in the refrigerator overnight before serving.

These are tasty!

Enjoy!

Terri


Warmth.

IMG_0498 (1)

The snow is starting to fly, temps are taking a dip, the Aspens are turning gold.  And I love the warmth that my Labradors brings to my heart.  So loyal and loving.  I think about foods to keep me warm and satiated.  I also worry about the people living on the streets.  I am especially concerned with the welfare of children.  If you have the ability, please consider donating a coat to Operation Warm.  Click here to see how you can make a difference in your own town, https://www.operationwarm.org/

So while I watch the snow falling down outside my kitchen window, I offer this tasty dish,  Slow Cooker Pork Roast with onion & honey marinade.

Slow Cooker Pork Roast with Onion and Honey marinade

Ingredients:

2 1/2- 3 lb Pork Roast

1 Red Onion, skin removed and sliced thinly into rounds

1/2 C honey

1/4 C soy sauce

2/3 C Shredded Parmesan Cheese.  (Use the good stuff or shred your own.  It makes a huge difference in the flavor)

2-3 T minced garlic  (Hack:  use the stuff in the jar- oil packed.  good flavor and tastes great)

3/4 tsp kosher salt

1/2 tsp fresh ground black pepper

2 T dried basil

2 T Tuscan-style Italian Seasoning  (find it here: https://www.amazon.com/McCormick-Gourmet-Tuscan-Blend-1-25/dp/B01M0ANZZ7/ref=sr_1_1_a_it?ie=UTF8&qid=1506281301&sr=8-1&keywords=mccormick+spices+tuscan)

Here We Go:

Set your slow cooker to 8 hours.  Place the sliced onions in the bottom of the slow cooker.  Place pork roast on top of onions.

IMG_3798

In medium bowl, mix the remaining ingredients together.  Pour over the top of the pork roast.  Now, go on a hike, a walk or go do laundry.

When slow cooker has cooked the pork roast, remove the pork roast from the cooker and shred the meat.   SAVE the juices/liquid and move to sauce pan.


Bring to simmer and reduce juices till they have thickened.

To Serve:

Of course, you can turn this into pulled pork sandwiches; just place some on a bun with bit of BBQ Sauce, or the thickened sauce, a bit of coleslaw and a slice of sharp cheddar.  Or, serve on top of cauliflower rice, or mashed potatoes and top with the thickened juices.  Serve with fresh sliced tomatoes with minced basil, olive oil and sea salt.  Tonight, we are having them with broccoli tots.. crispy on the outside, tender on the inside.  And veggies!

IMG_3799

Yummy!

Enjoy!

Terri